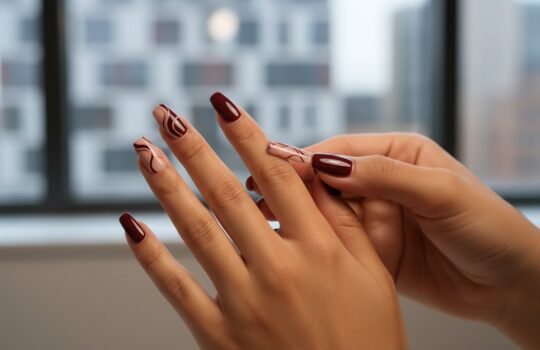
A flawless manicure isn’t a matter of luck; it’s a matter of millimetres. When an investment in a custom set fails to align with your natural sidewalls, the experience shifts from a luxury ritual to a source of quiet frustration. You’ve likely felt the sting of a £45 bespoke set popping off prematurely or looking artificial because of a slight sizing error. It’s a common friction point that disrupts the serenity of your self-care routine and wastes both your time and resources.
Mastering how to measure nails for press ons is the essential foundation for achieving a seamless fit that mirrors the clinical precision of a professional salon. We’ll guide you through a refined, expert-led process to map your natural nail beds with absolute accuracy. This guide unveils the technical steps required to ensure your next online order results in a luminous, high-grade finish that stays secure and looks entirely intentional. You’ll gain the confidence to curate your collection with the certainty of a perfect, bespoke silhouette every time.
Key Takeaways
- Master the ritual of precision to ensure perfect adhesive synergy and a bespoke fit that respects your natural nail health.
- Curate your essential toolkit, utilising transparent tape to achieve millimetre-perfect accuracy across your nail’s unique architecture.
- Discover the exact ritual of how to measure nails for press ons to capture the full curve of your sidewalls for a seamless, salon-grade finish.
- Unveil the science of your nail architecture, identifying how C-curves and bed shapes influence the final aesthetic of your custom look.
- Translate your precise data into standard sizing or bespoke configurations to achieve an effortless, high-end elegance.
The Foundation of Fit: Why Precision Measurement is Essential
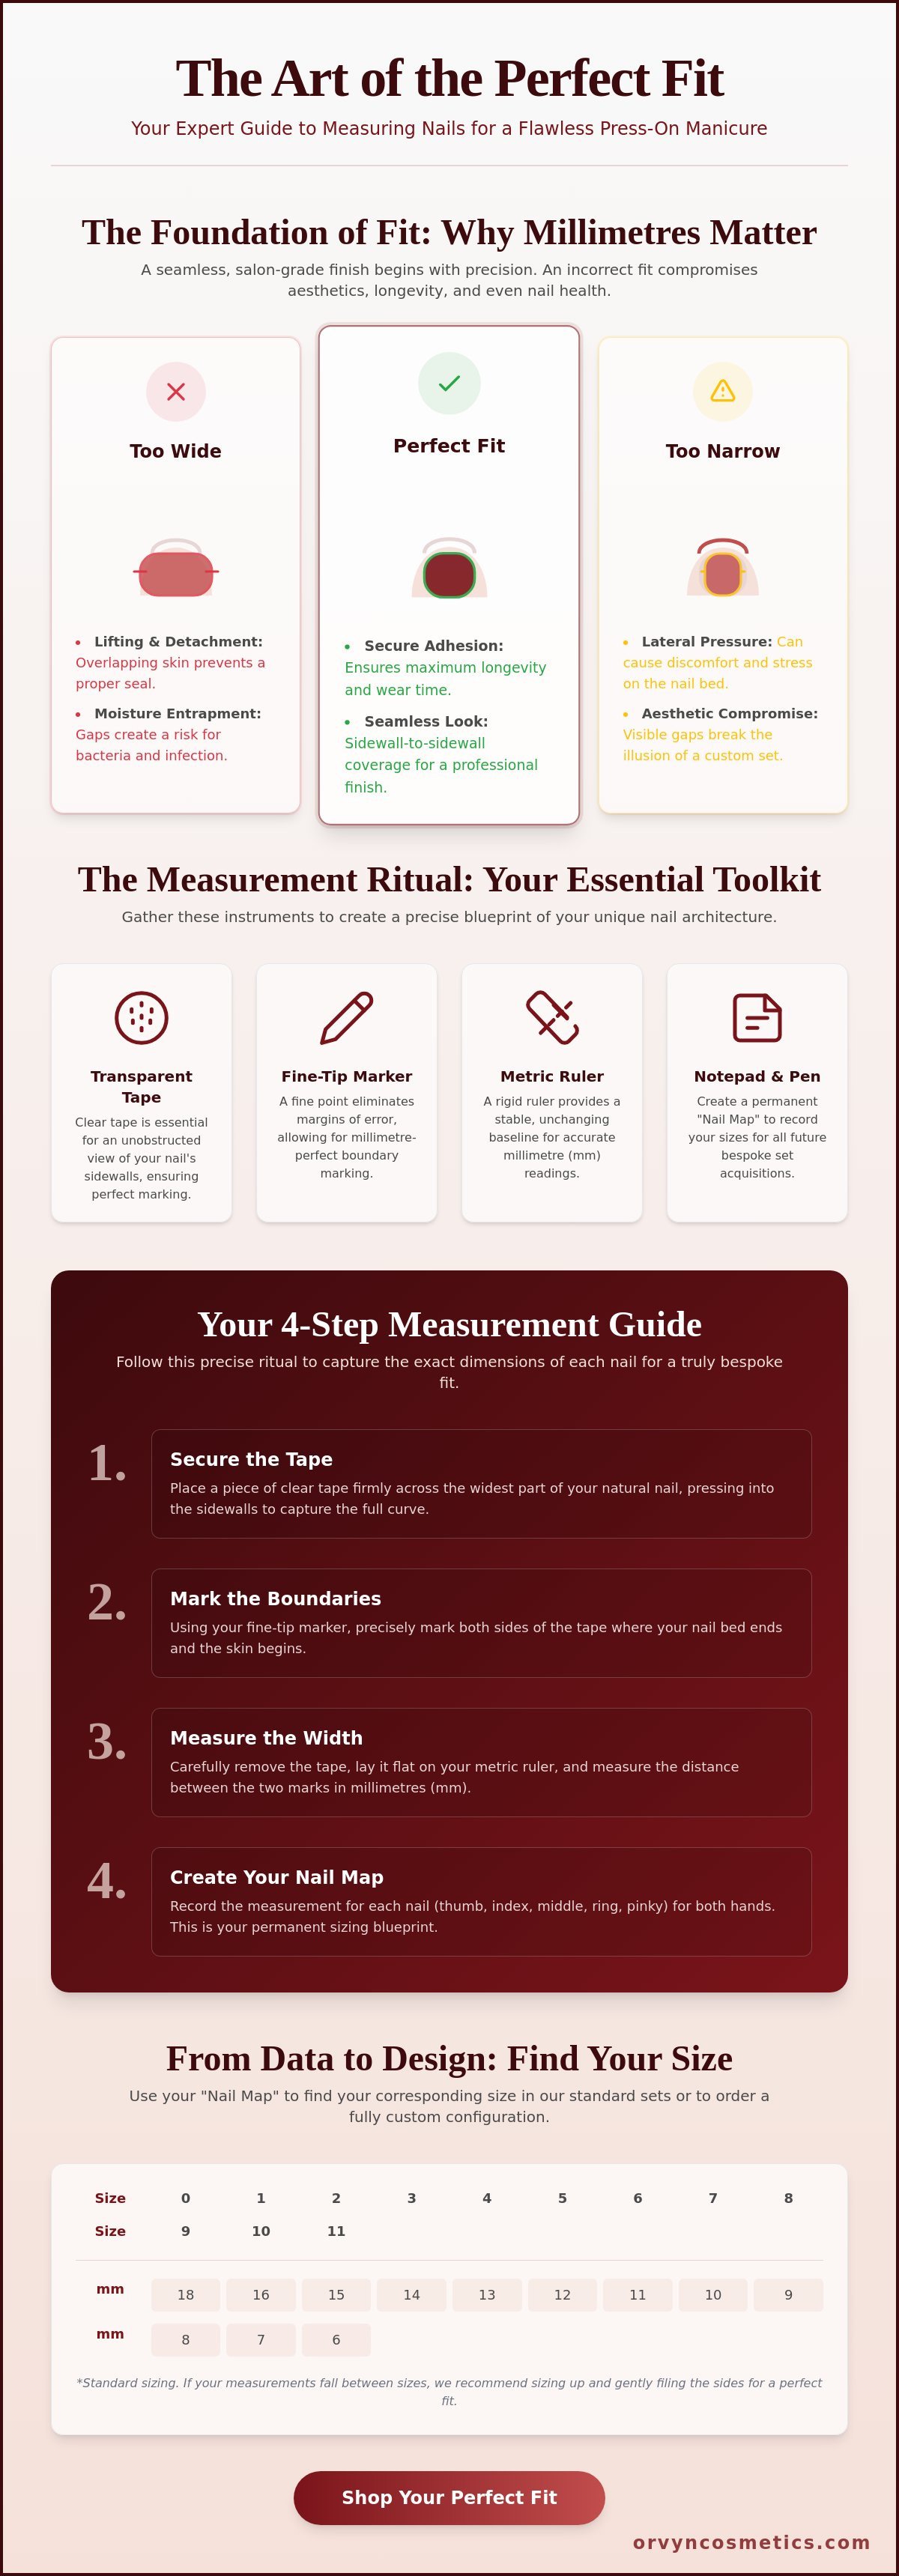
A bespoke nail experience begins with a single, precise calculation. While mass-market sets offer a generic approximation; custom press-ons require an intimate understanding of your unique anatomy. Learning how to measure nails for press ons is the first step in unveiling a look that is both luminous and enduring. This process transcends simple aesthetics. It’s about establishing a potent synergy between the natural nail plate and the enhancement. When the fit is exact, the adhesive performs with maximum efficacy, creating a bond that feels weightless yet secure.
The history and types of artificial nails reveal that fit has always been the primary indicator of quality. In 2026, the standard for luxury is the “sidewall-to-sidewall” concept. This technical term refers to total nail plate coverage. The press-on must span the entire width of the nail, from one lateral fold to the other, without encroaching on the surrounding skin. This precision ensures the set looks like a professional salon application rather than a temporary overlay. A perfect fit fosters a sense of calm confidence, knowing your manicure is a true reflection of refined, expert-led care.
The Consequences of Ill-Fitting Press-Ons
Precision is a fundamental requirement for nail health. Sets that are too narrow exert constant lateral pressure on the nail bed. Over time, this stress can lead to discomfort or structural damage. Conversely, sets that are too wide create significant functional issues. These include:
- Lifting: Overlapping the skin prevents the adhesive from sealing, leading to premature detachment.
- Moisture Entrapment: Gaps at the edges become reservoirs for water and bacteria, increasing the risk of infection.
- Aesthetic Compromise: Visible gaps or “steps” at the sidewalls act as a visual tell, breaking the illusion of a bespoke set.
Bridging the Gap Between Home and Salon
Professional-grade measurement empowers you to curate a salon-standard result within your own space. Accuracy is the cornerstone of the best custom press on nails uk experience. It transforms a simple purchase into an intentional ritual. Approach your measurement with a clinical yet serene mindset. By mastering how to measure nails for press ons, you move beyond the limitations of high-street products. You embrace a philosophy where every detail is chosen for its weight and purpose. This deliberate pace ensures longevity and a sense of quiet, high-end elegance that defines the modern, conscious consumer.
Preparing Your Canvas: Tools for the Measurement Ritual
Precision is the cornerstone of the Orvyn experience. Achieving a bespoke fit requires more than a casual glance; it demands a clinical approach to detail. When you learn how to measure nails for press ons, you’re not just recording numbers. You’re creating a blueprint for comfort and longevity. A mismatch of even a single millimetre can lead to lifting or discomfort, undermining the elegance of your manicure.
The process begins with the right instruments. Accuracy is non-negotiable. Using the wrong tools introduces variables that compromise the final result. By treating this preparation as a mindful ritual, you ensure that your press-ons look indistinguishable from a professional salon application. It’s about the synergy between technical exactness and personal care.
The Orvyn Recommended Toolkit
- Transparent tape: Clarity is vital. Avoid masking or paper tapes that obscure the nail plate. Clear tape allows you to see the exact boundaries of your nail walls without distortion.
- A fine-tip permanent marker: Precision lives in the details. A thick felt tip can add a 0.5mm margin of error to your markings. Use a fine-point pen to mark the widest part of your nail with absolute certainty.
- A rigid metric ruler: While soft measuring tapes are common in dressmaking, they can stretch or warp over time. A high-grade plastic or metal ruler with clear millimetre (mm) markings provides a stable, unchanging baseline for your “Nail Map.”
- A dedicated notepad: Documenting your measurements creates a permanent record for future sets. This avoids the need to repeat the ritual before every new acquisition.
While gathering your tools, consider the longevity of your look. Good Housekeeping’s guide to applying press-on nails notes that selecting the correct size is the most important factor in preventing premature lifting. If you find yourself between two sizes after measuring, always opt for the slightly larger one; you can refine the edges with a file for a seamless transition.
Optimal Conditions for Accuracy
Environment dictates outcome. To master how to measure nails for press ons, you must control your surroundings. Natural light is your most potent ally. Artificial yellow light can cast shadows that hide the true edge of the nail bed. Position yourself near a window during daylight hours to unveil the authentic silhouette of your hands.
Your nails must be in their most natural state. Remove all traces of polish, gel, or previous enhancements. Even a thin layer of clear base coat can add bulk, leading to an inaccurate reading. Cleanse your hands thoroughly but avoid soaking them. Prolonged water exposure causes the nail plate to expand temporarily, which will lead to a loose fit once the nails dry and contract.
Temperature plays a subtle yet significant role. Ensure your hands are at a neutral, comfortable temperature. Extreme cold causes the skin to pull away from the nail, while excessive heat can lead to slight swelling of the fingertips. Aim for a steady room temperature of approximately 21°C. This stability ensures your measurements reflect your true anatomy. Once your blueprint is ready, you can confidently explore our curated essentials to begin your transformation.
The Step-by-Step Guide to Measuring Your Nails at Home
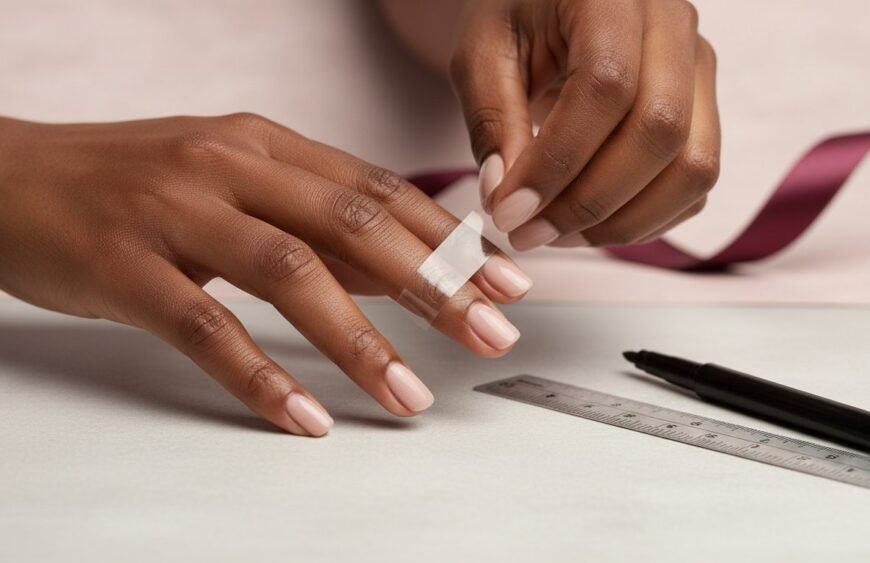
Precision is the foundation of elegance. To achieve a bespoke fit that mirrors a professional salon service, you must approach the measurement process with intentionality. Start by applying a piece of transparent tape across the widest part of your natural nail bed. It’s vital to press the tape firmly into the sidewalls to capture the full arc of your nail’s surface. The sidewall is the lateral fold of the nail. By contouring the tape to this curve, you ensure the resulting measurement accounts for the three-dimensional volume of the nail, rather than just a flat width.
Use a fine-point pen to mark the exact points where the nail plate meets the skin on both sides. Once you’ve captured these coordinates, carefully peel the tape away and transfer it to a flat, stable surface. This step is where you transform physical data into a digital order. Measure the distance between your marks using a ruler, focusing exclusively on the small millimetre increments. Repeat this ritual for every finger on both hands. Documenting each measurement individually is essential, as even slight variations between your left and right hands can dictate the success of your final look.
The Tape and Ruler Technique
Accuracy thrives on the “measure twice, order once” philosophy. When you align your tape marks with the ruler, ensure the first mark sits exactly on a millimetre line to avoid estimation errors. This methodical approach is the same one used by technicians when following professional application tips from Harper’s BAZAAR to ensure a flush, seamless finish at the cuticle. Learning how to measure nails for press ons requires this level of clinical focus to prevent the lifting or discomfort associated with ill-fitting enhancements. Treat this stage as a diagnostic part of your beauty routine, ensuring your bespoke set feels like a natural extension of your own hands.
Common Pitfalls to Avoid
Small errors often lead to significant frustrations. One frequent mistake is including the width of the pen mark itself in your final count. A standard felt-tip mark can add 0.5mm to your measurement, which is enough to cause a size mismatch. Always measure from the centre of one mark to the centre of the next. Additionally, don’t assume your hands are symmetrical. Data from ergonomic studies suggests that the dominant hand’s nail beds are often 2% to 5% wider due to frequent use and increased blood flow. Finally, never use inches. The industry standard for press-on sizing is strictly millimetres, and attempting to convert fractions of an inch will compromise the integrity of your bespoke fit.
Advanced Mapping: Understanding Your Nail Architecture
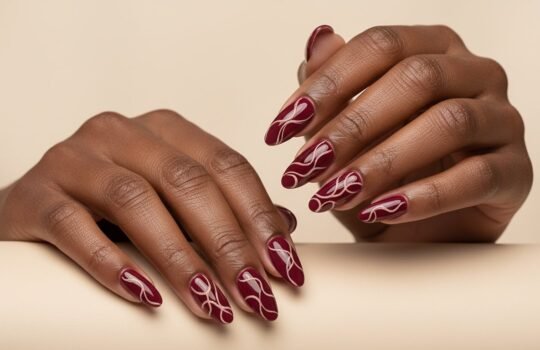
Mastering the technical nuances of your nail architecture is the final step in achieving a bespoke fit. Your nail bed shape, whether it is square, oval, or flared, dictates how the press-on sits against the natural plate. Flared nails, which widen toward the free edge, often require sizing up by 0.5mm to ensure the sidewalls remain fully encapsulated. Understanding how to measure nails for press ons requires looking beyond simple width; it involves a clinical assessment of your hand’s unique geometry.
The architecture of the hand is as individual as a fingerprint. Square nail beds provide a stable, broad foundation, while oval plates offer an elongated, delicate canvas. These structural variations influence how the artificial tip distributes pressure across the keratin layers. Recognising your specific plate type allows you to choose a silhouette that complements your natural growth pattern, ensuring the result looks intentional rather than applied.
The C-Curve and Flat Nail Plate Considerations
The C-curve represents the lateral arch of your nail. It defines the structural integrity of the application. Flat nail plates lack this natural vault. They often require a thicker layer of adhesive or a specialised gel tab to bridge the gap between the natural nail and the artificial tip. A study of nail morphology suggests that 35% of individuals possess a flat nail plate, requiring a more deliberate application ritual to avoid air pockets.
Conversely, a deep C-curve can make a nail appear narrower than its actual measurement. When you learn how to measure nails for press ons, you must account for this three-dimensional volume. A curve that exceeds a 45 degree arc typically requires a size larger than the flat width suggests. This synergy between curvature and adhesive choice ensures the bond remains secure for the full 14 day wear cycle. Precise mapping prevents the tension that leads to natural nail fatigue.
Shape-Specific Sizing Nuances
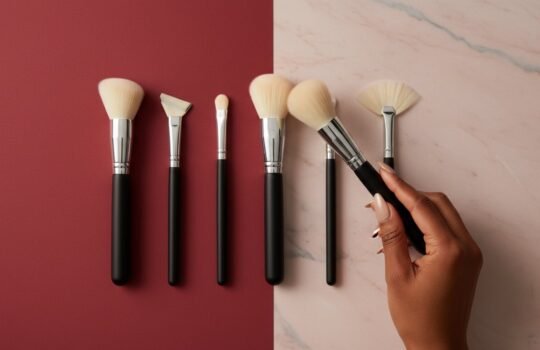
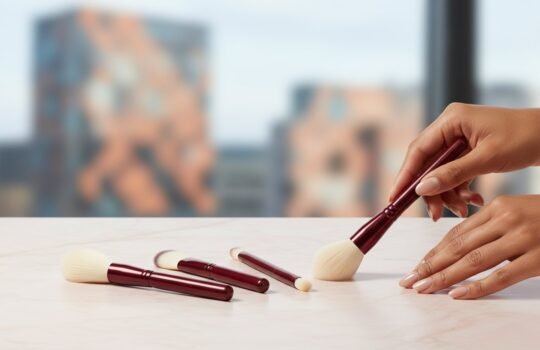
The silhouette you choose influences the perceived fit and physical comfort. Stiletto and almond shapes feature a dramatic taper. This design can feel tighter around the stress points than a traditional square tip. Vertical length also plays a role in physical leverage. A 25mm long stiletto tip exerts significantly more torque on the natural nail bed than a 12mm active length square tip. To ensure precision during this ritual, consult our makeup brushes and tools guide for instruments that assist in meticulous application and clean-up.
When selecting a tapered silhouette, consider the sidewall contact. A stiletto shape often requires a slightly wider base to maintain structural balance. This prevents the press-on from pinching the natural plate, which can cause discomfort after 48 hours of wear. Balancing the length with the width of your natural architecture creates a harmonious, high-end aesthetic.
Unveiling Your Custom Look: From Data to Design
Precision is the blueprint for radiance. Once you have captured your measurements, the transition from raw data to a bespoke aesthetic begins. Most standard sizing charts categorise nails into Small, Medium, or Large based on common width averages. For instance, a Small set typically accommodates widths of 15mm, 12mm, 13mm, 11mm, and 8mm. However, the human hand rarely adheres to such rigid boundaries. If your thumb measures 16mm but your ring finger is a narrow 10mm, standard sizes may fail you.
Choosing a Custom Size option is the most intentional path to a flawless fit. This allows you to submit your specific millimetre data directly to the artisan. It ensures the sidewalls of the press-on align perfectly with your natural nail grooves. A bespoke fit prevents the tension of a tip that’s too small; it also eliminates the lifting caused by one that’s too wide. Before you finalise your order, compare your recorded measurement map against the brand’s specific sizing chart. This final inspection is your safeguard against error. When you are ready to order custom press on nails with confidence, understanding the full process from digital sizing to adhesive selection ensures a durable, high-end finish that respects your natural nail health.
Preparation is the final step in this refined ritual. While you wait for your set to arrive, focus on the health of your natural canvas. Gently push back your cuticles. Buff away surface oils. A clean, dehydrated nail plate ensures the adhesive creates a potent, seamless bond. When your custom set arrives, it won’t just sit on top of your nails; it will feel like a natural extension of your hands.
Sizing Kits: The Ultimate Expert Alternative
If you seek absolute certainty, a physical sizing kit is the definitive choice. While learning how to measure nails for press ons manually is an essential skill, a kit provides a sensory experience that data cannot replicate. You can test the physical tips against your nail beds. You see the curve. You feel the coverage. This eliminates the minor 1% or 2% margin of error found in manual tape methods. Once you identify your numbers through a kit, you possess a permanent reference for every future custom order.
The Orvyn Commitment to Bespoke Beauty
We view your measurements as the foundation of a luminous result. At Orvyn, we use your data to curate a set that mirrors the elegance of a professional salon visit. This precision is an essential part of your broader beauty evolution. For a truly cohesive finish, we recommend integrating your nail ritual with essential skincare for makeup prep. High-performance aesthetics require a healthy, hydrated base. True empowerment is found in these moments of professional-grade self-care. It’s a quiet, sophisticated luxury that begins at your fingertips.
Your Path to a Bespoke Aesthetic
Mastering how to measure nails for press ons transforms a routine beauty task into a precise, intentional ritual. You’ve discovered that millimetre accuracy serves as the foundation for a seamless, natural-looking fit that rivals traditional salon applications. By understanding your unique nail architecture and using expert-led mapping techniques, you eliminate the guesswork often found in mass-market alternatives. This level of detail ensures your manicure remains secure and comfortable for the duration of its wear.
At Orvyn, we believe every hand deserves a custom approach. Our commitment to clinical efficacy and sensory luxury means each set is designed with your specific data in mind. You don’t need to compromise on quality when you have the tools to achieve professional results at home. It’s an evolution of your self-care routine, where science and elegance meet to create a look that’s uniquely yours. Begin your journey toward a more refined, effortless beauty today.
Explore the Orvyn Custom Press-On Collection
Frequently Asked Questions
What if my nail measurement falls between two sizes?
Always select the larger size if your measurement sits between two increments. It’s simpler to refine a tip with a 180-grit file than to force a fit that’s too narrow. A bespoke finish requires precision, and a slightly larger size ensures full sidewall coverage for a seamless, professional look.
Do I need to measure both hands for custom press-ons?
Yes, you must measure every finger on both hands to achieve a perfect fit. Most individuals exhibit a 0.5mm to 1mm variance between their dominant and non-dominant hands. Capturing these subtle differences is the only way to ensure your press-ons look like a natural extension of your own nails.
How do I measure my nails if I have a very high C-curve?
Use the flexible tape method to account for the internal volume of a high C-curve. Standard flat rulers often miss 2mm of surface area on curved beds. By pressing a piece of tape into the deepest part of the curve and marking the edges, you capture the true width needed for a comfortable, secure bond.
Can I use a soft sewing tape measure instead of tape and a ruler?
A rigid ruler and clear tape provide more accuracy than a soft sewing tape. Sewing tapes are often 1.5mm thick, which can distort your final reading. For a precise ritual, use thin adhesive tape and a metal ruler to ensure your millimetre measurements are exact and reliable.
Does the shape of the press-on change my size?
Different shapes can influence how a tip sits against your natural anatomy. While the width remains your primary guide, a tapered Coffin shape might feel tighter at the free edge than a soft Round style. Learning how to measure nails for press ons correctly ensures you account for these structural nuances across various silhouettes.
Should I measure my nails with or without base coat?
Measure your nails in their most natural, bare state. Even a thin layer of 0.2mm base coat can alter the surface tension and final fit of the adhesive. Start with a clean, naked nail to ensure the essence of your bespoke fit is perfectly calibrated to your unique biology.
How often should I re-measure my nails?
Re-evaluate your measurements every 6 months to account for subtle physiological shifts. Changes in hydration levels or seasonal temperatures can alter nail bed width by up to 5 percent. Regular checks turn your manicure into an evolving ritual of self-care and precision.
What is the most common mistake when measuring for press-on nails?
The most frequent error is measuring the tip rather than the widest part of the nail bed. Failing to align your tape with the true centre point results in a 15 percent higher risk of premature lifting. Mastery of how to measure nails for press ons begins with identifying that central, widest horizontal axis for every finger.